宅内CentOS8にSoftEtherをインストールしてインターネット外部からLAN参加出来るVPN環境を無料で作る
2020/04現在、COVID-19の影響を受けて自宅から会社のVPNに繋いでリモートワークに移行している方も増えてきたんじゃないでしょうか。
(残念ながら私はまだ出社必須ですが(-_-;
そもそも、ものづくりがメイン業務である技術系エンジニアにとっては「出社 is 何」なところもありましたよね。
世の中のOSSコミュニティのようにgithub使ってビデオチャットしながら進めれば大概の場合はなんの問題も無い訳で。
今回の件でリモートワーク化の流れが加速し続けるというのは大方の予想ですし、社員全員が会社のVPN機器に繋いで負担を掛けるより、各自が自宅にVPN環境を持っていて拠点間をブリッジで繋ぐ運用なんかも当たり前になってくるかも知れません。
本格的なVPN導入はハードウェア機器を使うとして、個人ユースやカフェから自宅LAN環境をフル活用したい程度の目的なら安価に済ませたいものです。
VPNの勉強も兼ね、今回はSoftEtherで宅内にでVPNサーバを建てて外出先のネット環境から家のLANに参加出来るようにしてみたいと思います。
手順はSoftEther公式を見ながらやっていきます。
ちょっと情報が古いのでCentOS8用に読み替えながら。

CentOS8に入れるのは初めてでしたが、CentOS7へのインストールと差異は無く、すんなりインストールして使用することが出来ました。素晴らしいですねSoftEther。
構築環境
SoftEtherは「VPNサーバプログラム本体」と「本体を設定するGUIプログラム」で構成されます。
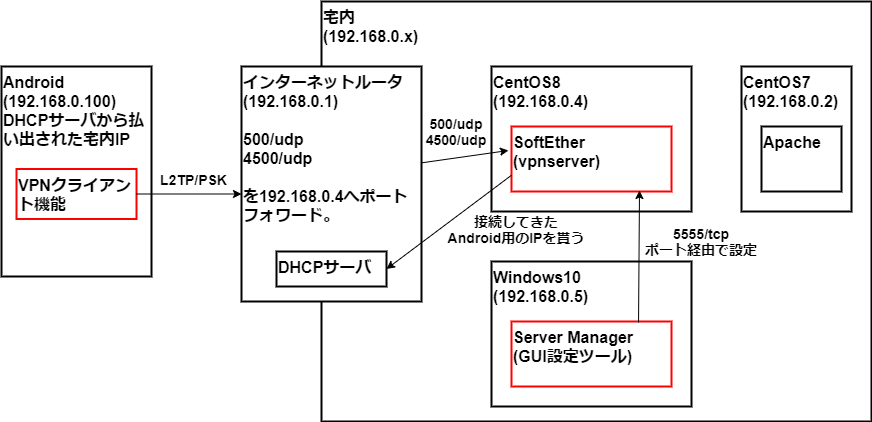
- DHCPサーバ(インターネットルータの機能を使用)
- CentOS8(SoftEther(VPNサーバ)をインストール)
- Windows10(Server Manager用、MacOSXでも可)
- Android9(インターネットからのVPN接続確認用)
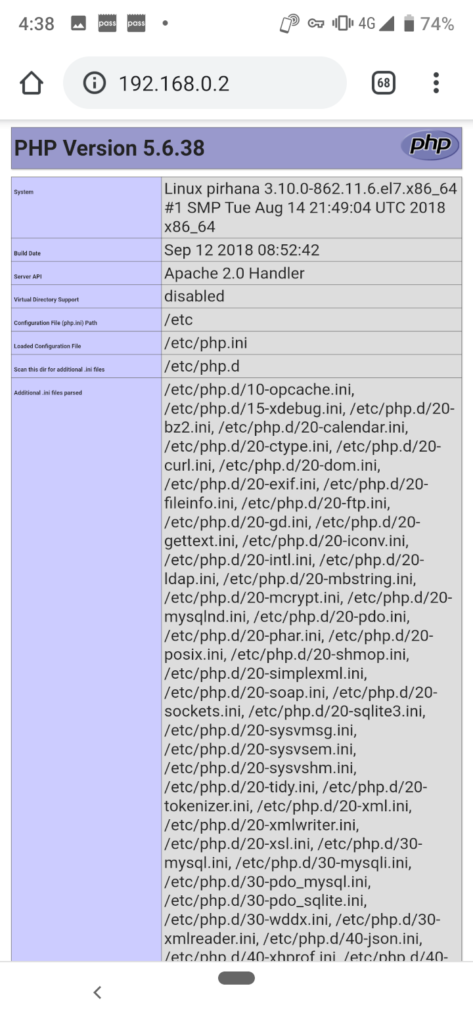
外出先からAndroidで宅内LANのIPを貰い、宅内ApacheにローカルIP(192.168.0.2)でアクセス出来るようにします。
接続してくるユーザに事前に暗号化キーを教えておくPSK(Pre Shared Key)はセキュリティ的に弱いので、ガッツリ使うVPNにする場合はクライアント証明書の導入を検討するか、H/W機器を買うかも考慮です。
前準備
gccをインストールしておく
makeするので入っていなければ入れておきます。
# dnf install gccSELinuxを切っておく
罪悪感を感じながら。
# getenforce
Enforcing

# setenforce 0

# vi /etc/selinux/config
#SELINUX=enforcing
SELINUX=disabled
IPフォワード出来るようにしておく
# echo 1 >/proc/sys/net/ipv4/ip_forward
# cd /etc/
# vi sysctl.conf

net.ipv4.ip_forward = 1
SoftEtherインストール&設定
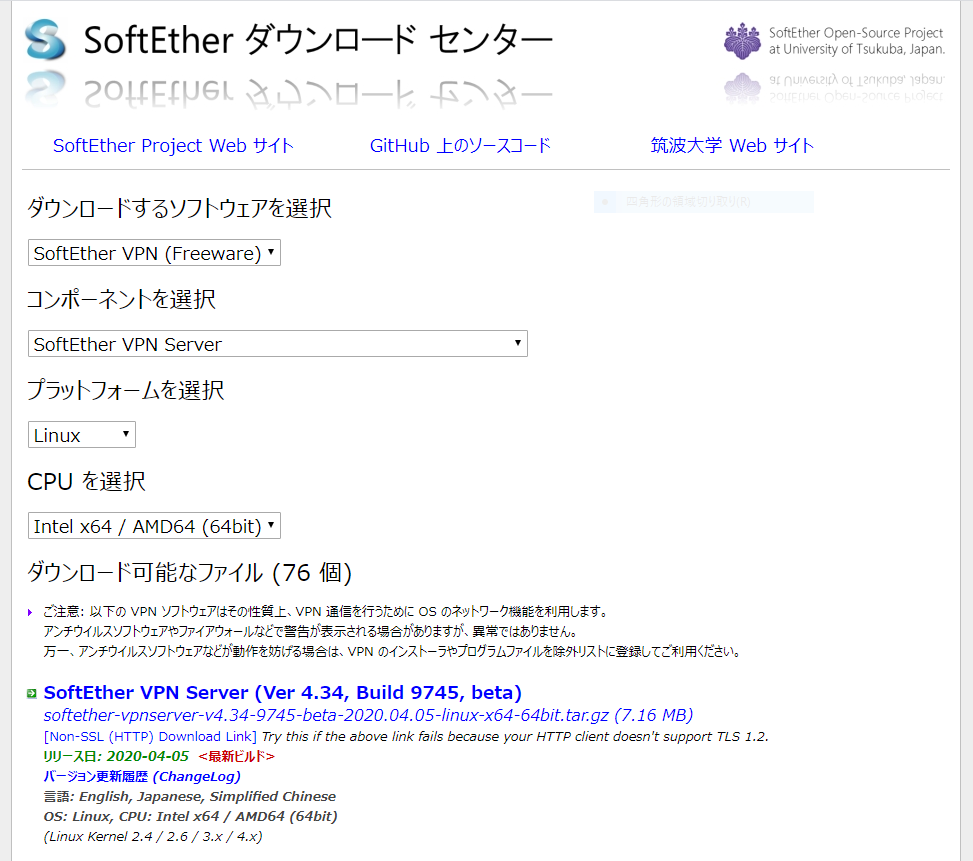
tar.gzをダウンロードして解凍
プラットフォームとCPUを選択して4.34をダウンロード。betaだけどここずっとbetaが続いているので気にせず人柱になるつもりで。
https://www.softether-download.com/ja.aspx?product=softether
適当なディレクトリに移動して、wgetで上記リンク先tar.gzをGET。
# cd /tmp
# wget https://github.com/SoftEtherVPN/SoftEtherVPN_Stable/releases/download/v4.34-9745-beta/softether-vpnserver-v4.34-9745-beta-2020.04.05-linux-x64-64bit.tar.gz
解凍して出来たvpnserverディレクトリに入る。
# tar xzvf softether-vpnserver-v4.34-9745-beta-2020.04.05-linux-x64-64bit.tar.gz
# cd vpnserver/
# ls
Authors.txt  ReadMeFirst_Important_Notices_cn.txt  ReadMeFirst_Important_Notices_ja.txt  code         lib
Makefile     ReadMeFirst_Important_Notices_en.txt  ReadMeFirst_License.txt               hamcore.se2
ビルド開始
makeコマンド実行。ライセンス条項を読むかどうか聞かれるので1を選択。
# make
--------------------------------------------------------------------

SoftEther VPN Server (Ver 4.34, Build 9745, Intel x64 / AMD64) for Linux Install Utility
Copyright (c) SoftEther Project at University of Tsukuba, Japan. All Rights Reserved.

--------------------------------------------------------------------


Do you want to read the License Agreement for this software ?

 1. Yes
 2. No

Please choose one of above number:
1
ライセンス条項を読んで理解したか聞かれるので1を入力。
// ライセンス条項

(snip)

Did you read and understand the License Agreement ?
(If you couldn't read above text, Please read 'ReadMeFirst_License.txt'
 file with any text editor.)

 1. Yes
 2. No

Please choose one of above number:
1
ライセンス条項に同意するか聞かれるので1を入力。
Did you agree the License Agreement ?

1. Agree
2. Do Not Agree

Please choose one of above number:
1
makeが自動継続されます。
make[1]: ディレクトリ '/tmp/vpnserver' に入ります
Preparing SoftEther VPN Server...
ranlib lib/libcharset.a
ranlib lib/libcrypto.a
ranlib lib/libedit.a
ranlib lib/libiconv.a
ranlib lib/libintelaes.a
ranlib lib/libncurses.a
ranlib lib/libssl.a
ranlib lib/libz.a
ranlib code/vpnserver.a
gcc code/vpnserver.a -fPIE -O2 -fsigned-char -pthread -m64 -lm -lrt -lpthread -L./ lib/libssl.a lib/libcrypto.a lib/libiconv.a lib/libcharset.a lib/libedit.a lib/libncurses.a lib/libz.a lib/libintelaes.a -ldl -o vpnserver
ranlib code/vpncmd.a
gcc code/vpncmd.a -fPIE -O2 -fsigned-char -pthread -m64 -lm -lrt -lpthread -L./ lib/libssl.a lib/libcrypto.a lib/libiconv.a lib/libcharset.a lib/libedit.a lib/libncurses.a lib/libz.a lib/libintelaes.a -ldl -o vpncmd
./vpncmd /tool /cmd:Check
vpncmd コマンド - SoftEther VPN コマンドライン管理ユーティリティ
SoftEther VPN コマンドライン管理ユーティリティ (vpncmd コマンド)
Version 4.34 Build 9745   (Japanese)
Compiled 2020/04/05 23:39:56 by buildsan at crosswin
Copyright (c) SoftEther VPN Project. All Rights Reserved.

VPN Tools を起動しました。HELP と入力すると、使用できるコマンド一覧が表示できます。

VPN Tools>Check
Check コマンド - SoftEther VPN の動作が可能かどうかチェックする
---------------------------------------------------
SoftEther VPN 動作環境チェックツール

Copyright (c) SoftEther VPN Project.
All Rights Reserved.

この動作環境チェックツールを実行したシステムがテストに合格した場合は、SoftEther VPN ソフトウェアが動作する可能性が高いです。チェックにはしばらく時間がかかる場合があります。そのままお待ちください...

'カーネル系' のチェック中...
              [合格] ○
'メモリ操作系' のチェック中...
              [合格] ○
'ANSI / Unicode 文字列処理系' のチェック中...
              [合格] ○
'ファイルシステム' のチェック中...
              [合格] ○
'スレッド処理システム' のチェック中...
              [合格] ○
'ネットワークシステム' のチェック中...
              [合格] ○

すべてのチェックに合格しました。このシステム上で SoftEther VPN Server / Bridge が正しく動作する可能性が高いと思われます。

コマンドは正常に終了しました。


--------------------------------------------------------------------
The preparation of SoftEther VPN Server is completed !


*** How to switch the display language of the SoftEther VPN Server Service ***
SoftEther VPN Server supports the following languages:
  - Japanese
  - English
  - Simplified Chinese

You can choose your prefered language of SoftEther VPN Server at any time.
To switch the current language, open and edit the 'lang.config' file.


Note: the administrative password is not set on the VPN Server. Please set your own administrative password as soon as possible by vpncmd or the GUI manager.


*** How to start the SoftEther VPN Server Service ***

Please execute './vpnserver start' to run the SoftEther VPN Server Background Service.
And please execute './vpncmd' to run the SoftEther VPN Command-Line Utility to configure SoftEther VPN Server.

Of course, you can use the VPN Server Manager GUI Application for Windows / Mac OS X on the other Windows / Mac OS X computers in order to configure the SoftEther VPN Server remotely.

*** For Windows users ***
You can download the SoftEther VPN Server Manager for Windows
from the http://www.softether-download.com/ web site.
This manager application helps you to completely and easily manage the VPN server services running in remote hosts.


*** For Mac OS X users ***
In April 2016 we released the SoftEther VPN Server Manager for Mac OS X.
You can download it from the http://www.softether-download.com/ web site.
VPN Server Manager for Mac OS X works perfectly as same as the traditional Windows versions. It helps you to completely and easily manage the VPN server services running in remote hosts.


*** PacketiX VPN Server HTML5 Web Administration Console (NEW) ***
This VPN Server / Bridge has the built-in HTML5 Web Administration Console.

After you start the server daemon, you can open the HTML5 Web Administration Console is available at

https://127.0.0.1:5555/
or
https://ip_address_of_the_vpn_server:5555/

This HTML5 page is obviously under construction, and your HTML5 development contribution is very appreciated.

--------------------------------------------------------------------

make[1]: ディレクトリ '/tmp/vpnserver' から出ます
make終了。vpnserverコマンドが出来る。
# ls -l
合計 12532
-rwxrwxrwx. 1 root root      82  4月  5 10:50 Authors.txt
-rwxrwxrwx. 1 root root    3611  4月  5 10:50 Makefile
-rwxrwxrwx. 1 root root   32075  4月  5 10:50 ReadMeFirst_Important_Notices_cn.txt
-rwxrwxrwx. 1 root root   37566  4月  5 10:50 ReadMeFirst_Important_Notices_en.txt
-rwxrwxrwx. 1 root root   52340  4月  5 10:50 ReadMeFirst_Important_Notices_ja.txt
-rwxrwxrwx. 1 root root    3587  4月  5 10:50 ReadMeFirst_License.txt
drwx------. 2 root root       6  4月 11 12:13 chain_certs
drwxrwxrwx. 2 root root      41  4月 11 12:13 code
-rwxrwxrwx. 1 root root 2008977  4月  5 10:50 hamcore.se2
-rw-------. 1 root root     867  4月 11 12:13 lang.config
drwxrwxrwx. 2 root root     170  4月 11 12:13 lib
-rwxr-xr-x. 1 root root 5339136  4月 11 12:13 vpncmd
-rwxr-xr-x. 1 root root 5335120  4月 11 12:13 vpnserver
/usr/localに配置、ファイル権限を変更、細かい設定
vpnserverディレクトリを/usr/localに移動。
ファイル権限を公式マニュアル通り変更。
# cd ..
# mv ./vpnserver /usr/local
# cd /usr/local/vpnserver/
# chmod 600 *
# chmod 700 vpncmd
# chmod 700 vpnserver
443ポートを掴もうとするので、HTTPサーバが動いている環境であれば443を使わないようにしておく。
# vi /usr/local/vpnserver/vpn_server.config

(snip)

        declare ListenerList
        {
                declare Listener0
                {
                        bool DisableDos false
#                        bool Enabled true
                        bool Enabled false
                        uint Port 443
                }
公式マニュアルではvpncmdコマンドで環境チェックしてね、とありますがインストールの時にチェックし終わっているので省略。
systemd用設定と起動
systemd経由でサービス起動出来るようにしておく。
# cd /etc/systemd/system
# vi vpnserver.service

[Unit]
Description=SoftEther VPN Server
After=network.target

[Service]
Type=forking
ExecStart=/usr/local/vpnserver/vpnserver start
ExecStop=/usr/local/vpnserver/vpnserver stop

[Install]
WantedBy = multi-user.target
サービス起動。
# systemctl start vpnserver

# systemctl status vpnserver
● vpnserver.service - SoftEther VPN Server
   Loaded: loaded (/etc/systemd/system/vpnserver.service; enabled; vendor preset: disabled)
   Active: active (running) since Sat 2020-04-11 12:55:51 EDT; 8s ago
  Process: 2843 ExecStart=/usr/local/vpnserver/vpnserver start (code=exited, status=0/SUCCESS)
 Main PID: 2867 (vpnserver)
    Tasks: 32 (limit: 26213)
   Memory: 18.3M
   CGroup: /system.slice/vpnserver.service
           tq2867 /usr/local/vpnserver/vpnserver execsvc
           mq2868 /usr/local/vpnserver/vpnserver execsvc

 4月 11 12:55:51 localhost.localdomain systemd[1]: Starting SoftEther VPN Server...
 4月 11 12:55:51 localhost.localdomain vpnserver[2843]: The SoftEther VPN Server service has been started.
 4月 11 12:55:51 localhost.localdomain vpnserver[2843]: Let's get started by accessing to the following URL from your PC:
 4月 11 12:55:51 localhost.localdomain vpnserver[2843]: https://192.168.0.103:5555/
 4月 11 12:55:51 localhost.localdomain vpnserver[2843]:   or
 4月 11 12:55:51 localhost.localdomain vpnserver[2843]: https://192.168.0.103/
 4月 11 12:55:51 localhost.localdomain vpnserver[2843]: Note: IP address may vary. Specify your server's IP address.
 4月 11 12:55:51 localhost.localdomain vpnserver[2843]: A TLS certificate warning will appear because the server uses self signed certifica>
 4月 11 12:55:51 localhost.localdomain systemd[1]: Started SoftEther VPN Server.
使用する3ポートをfirewalldで開放
firewalldで
- 5555/tcp(マネージャ接続ポート)
- 4500/udp
- 500/udp
を開放。後者二つはインターネットから接続する端末が使うUDP(TCPに非ず)。
# firewall-cmd --add-port=5555/tcp --zone=public --permanent
success

# firewall-cmd --add-port=500/udp --zone=public --permanent
success

# firewall-cmd --add-port=4500/udp --zone=public --permanent
success

# firewall-cmd --reload
success

# firewall-cmd --list-ports
9090/tcp 5555/tcp 500/udp 4500/udp
(9090/tcpはCentOS8を入れると自動で入るcockpitが使うポート)
以上でCentOS8側のインストールと設定完了です。
Server ManagerをインストールしてSoftEtherを設定する
ダウンロード、起動
Windows版(4.34 beta)をダウンロード。
以前CentOS7にSoftEtherを入れて既に旧バージョンをインストーラでインストール済みなので、今回はzip版を使ってみます。

zip解凍してvpnsmgr.exeを実行。
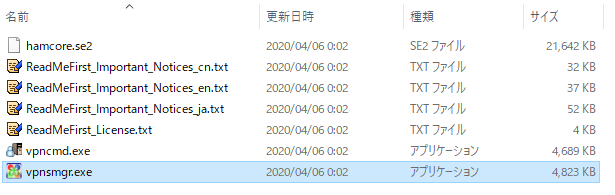
初期画面。zip版で起動しても、以前インストーラ版で設定した前の情報が出てきますが気にせず進めます。
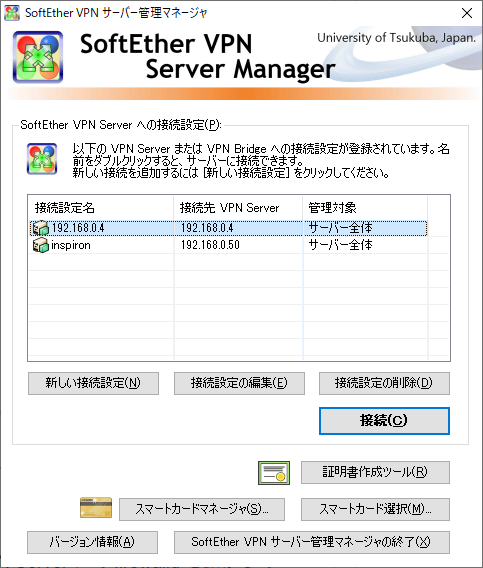
インストールしたvpnserverを設定
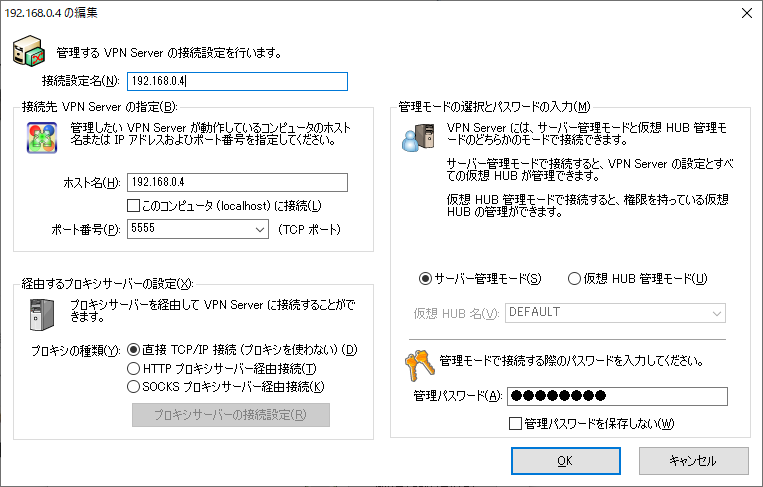
前画面の「新しい接続設定」ボタンをクリック。SoftEtherをインストールしたCentOS8のIP:5555を指定。
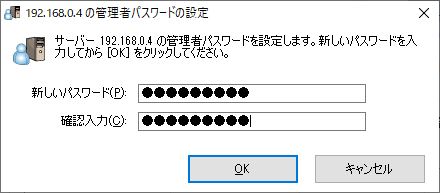
管理者用のパスワードを設定。
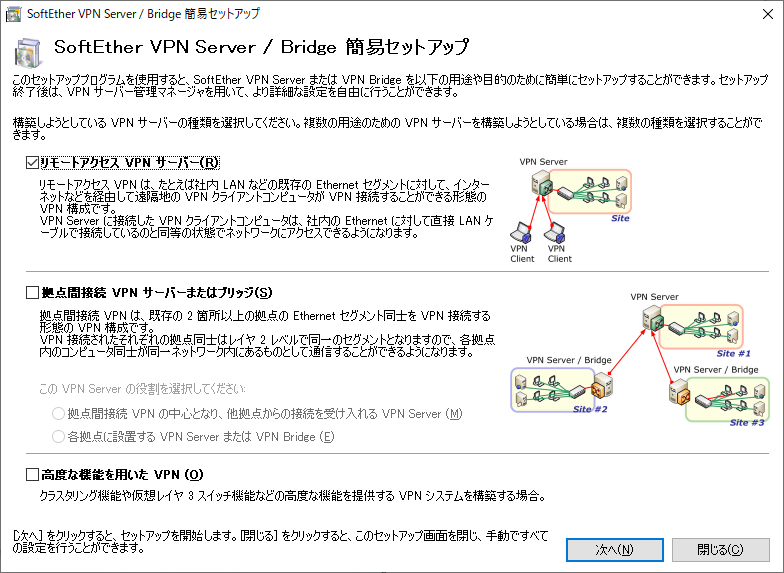
「リモートアクセスVPNサーバ」にチェックを入れて次へ。
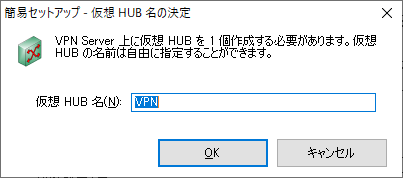
仮想HUBの名前を設定。
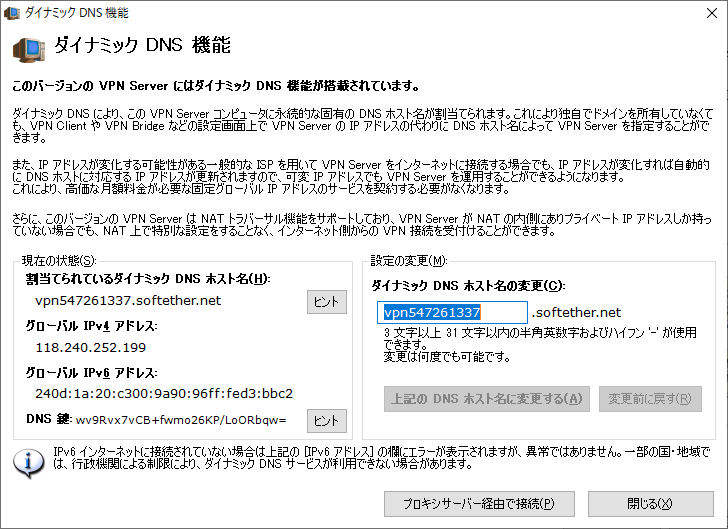
DDNS使わないので閉じる。
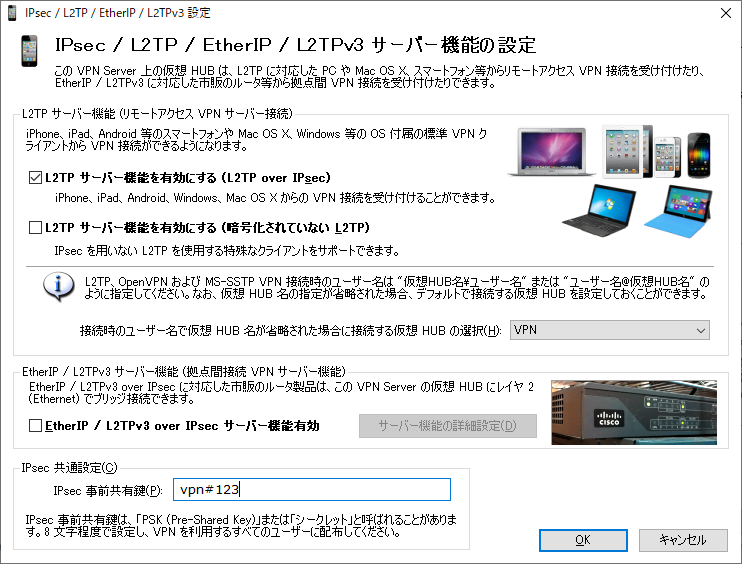
PSKの事前共有鍵を設定。流出しないように気を付けます。
(接続してくる人に教えなければならないのでまぁ無理ですが・・・)
ここでは参考までに「vpn#123」にしています。
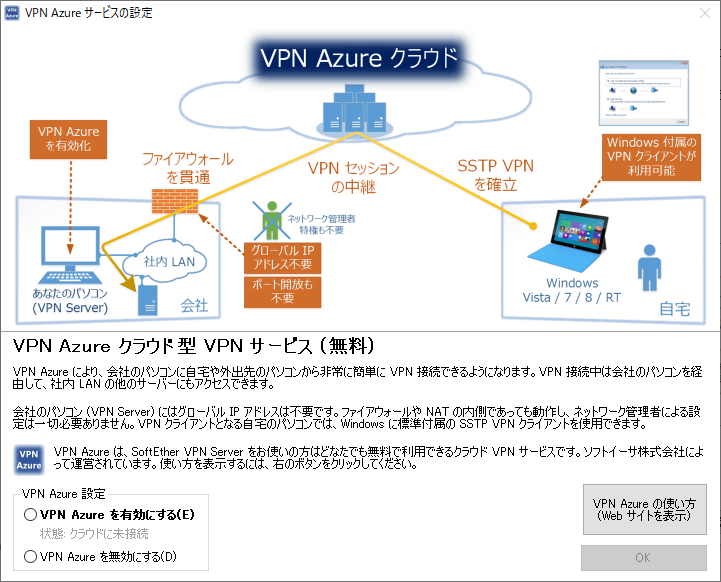
VPN Azure クラウド。今回は使わないので「VPN Azureを無効にする」を選択。
ngrokみたいな感じでFW関係なく疎通出来るっぽい?。無意味にお堅い会社ではNGだろうなぁ・・・。でもいつか試そう。
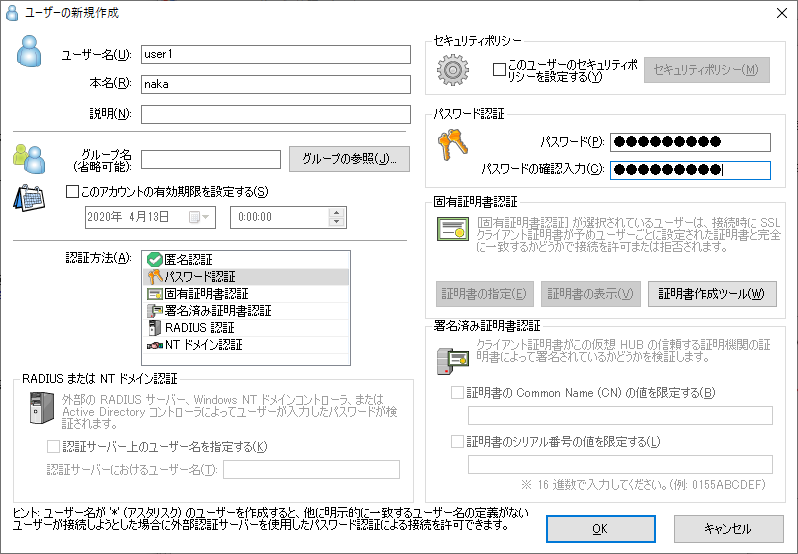
接続してくるユーザを作成、ローカルブリッジを設定
参考までにuser1ユーザとパスワードを作成。
「ローカルブリッジの設定」でCentOS8上の物理NICを選択しておきます。
忘れても後から「ローカルブリッジ設定」画面から設定出来ます。
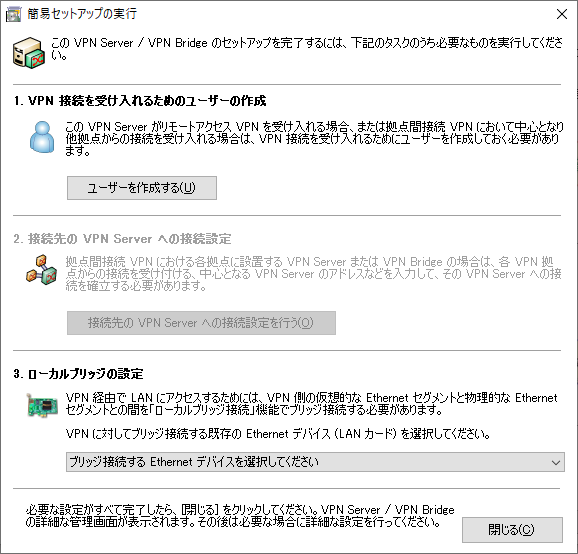

以上でVPNサーバの構築、完了です。
宅内インターネットルータで4500/udpと500/udpをポートフォワード
自宅のインターネット接続ルータの設定画面を開き、インターネットからの上記2ポートへのリクエストをSoftEtherを入れたCentOS8にフォワードしておきます。
ルータ機種によって設定方法が違うので割愛。
Androidで動作確認してみる
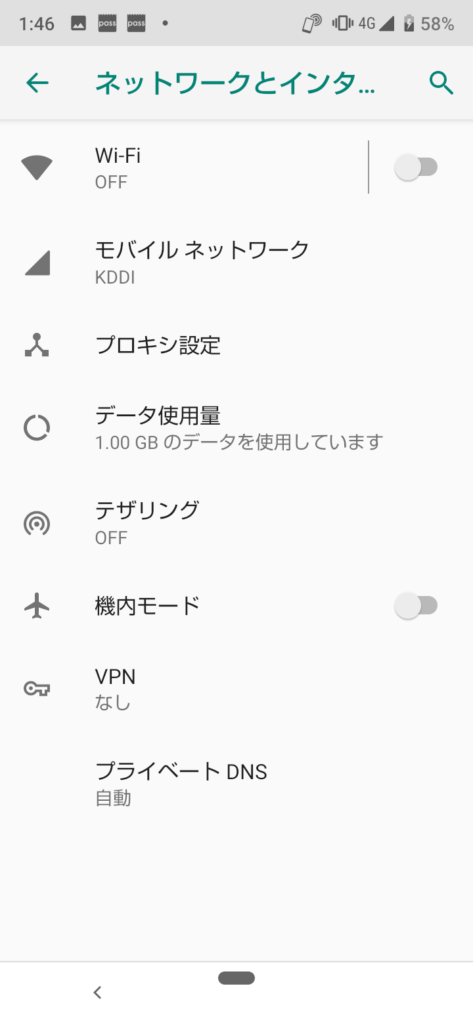
Androidの宅内WiFiへの接続を切り、インターネット経由で家のVPNサーバにアクセスしてみます。
「設定」→「ネットワークとインターネット」→「詳細設定」→「VPN」
新規追加。
- タイプ:L2TP/IPSec PSK
- サーバーアドレス:家のドメイン or IP
- IPSec事前共有鍵:vpn#123(Server Managerで設定したもの)
- ユーザー名:user1(Server Managerで設定したもの)
- パスワード:(Server Managerで設定したもの)
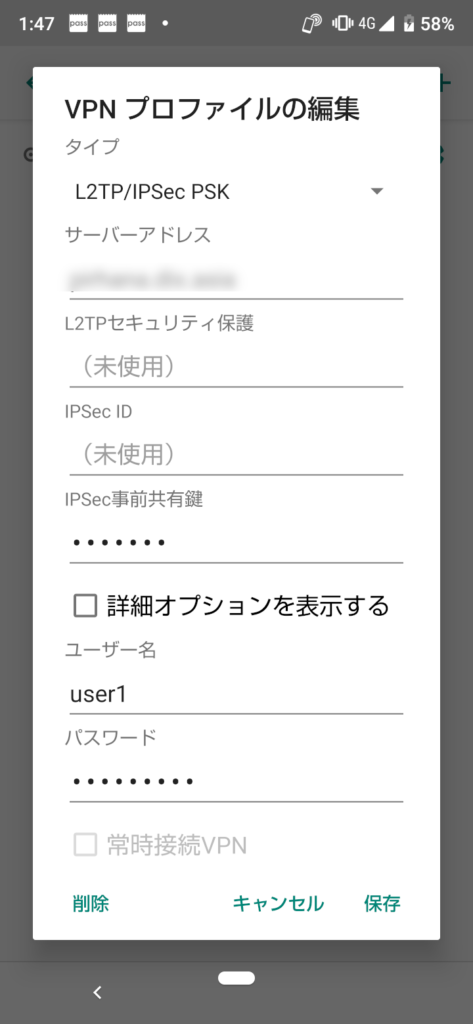
タップして接続。
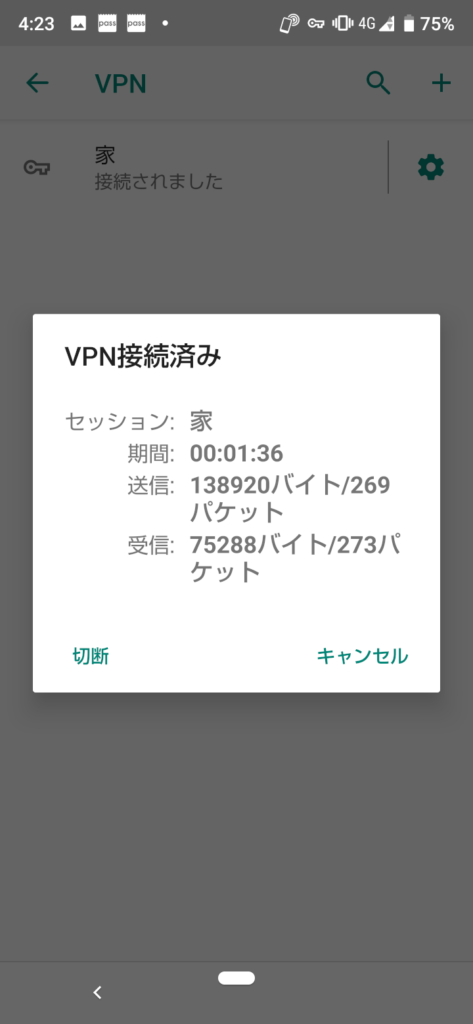
インターネット経由で、宅内ApacheにローカルIPでアクセス出来ました。
まとめ
以下の流れで宅内にVPNサーバを構築することが出来ました。
- CentOS8にSoftEtherをインストール
- ServerManagerで設定
- 宅内インターネットルータで4500/udp、500/udpをポートフォワード
- スマホ等でVPN設定
これでカフェやコワーキングスペースに居る時でも自宅環境をフル活用して開発出来るようになりますね。
次回はこのVPN環境を使ってビデオ会議環境を構築してみます。
