- 会社のコンプライアンス的にgithubが使えない
- 個人開発しているプログラムを完全にプライベートで管理したい
GitLabを家庭や社内でオンプレで使えばこれらのニーズを満たすことが出来ます。
留意点としてGitLabをインストールするPCは最低4GByteのメモリが無いと動作が重くなります。快適に使うには最低8GByteはメモリを積んだ方がいいです。
またGitLabはバージョンアップサイクルが早く、インストール方法も頻繁に変わる為、インストールの際は公式サイトを参照してインストール手順を確認した方が無難です。
目次
利用想定
- 個人利用、または社内ネットワークに閉じたリポジトリを想定
- ポートは18080を使用(80や8080はapacheやtomcatが使っているので)
- インターネットに出さないのでHTTPS化はしない
インストール前の準備
依存モジュールインストール
# yum install -y curl policycoreutils-python openssh-server
# systemctl enable sshd
# systemctl start sshd
postfixのインストール
マージリクエスト通知他をメールで送信する用。mattermostなど他の通知手段を使うなら不要ですが一応入れます。大概既にインストールされているはず。
# yum install postfix
# systemctl enable postfix
# systemctl start postfix
18080ポート開放
GitLabはデフォルトでは80ポートを使いますが、インストール時に18080に変更します。
# firewall-cmd --add-port=18080/tcp --zone=public --permanent
success
# firewall-cmd --reload
success
インストール
gitlabのyumリポジトリ情報を追加
# curl https://packages.gitlab.com/install/repositories/gitlab/gitlab-ce/script.rpm.sh | bash

    (snip)

Importing GPG key 0xE15E78F4:
 Userid     : "GitLab B.V. (package repository signing key) <packages@gitlab.com>"
 Fingerprint: 1a4c 919d b987 d435 9396 38b9 1421 9a96 e15e 78f4
 From       : https://packages.gitlab.com/gitlab/gitlab-ee/gpgkey
Generating yum cache for gitlab_gitlab-ee-source...

The repository is setup! You can now install packages.
/etc/yum.repos.dにgitlab_gitlab-ce.repoが入り、yum installの準備が出来ました。
gitlab-ceをyumインストール
シェル変数「EXTERNAL_URL」にインストール後のアクセスURLを設定することで、インストール後に別途設定する手間が省けるようになりました。
今回は「http://インストールPCのIP:18080/gitlab」でアクセスしたいので以下のように実行しています。
# EXTERNAL_URL="http://192.168.0.4:18080/gitlab" yum install -y gitlab-ce

   (snip)

  * service[grafana] action restart
    - restart service service[grafana]

Running handlers:
Running handlers complete
Chef Client finished, 530/1428 resources updated in 04 minutes 08 seconds
gitlab Reconfigured!

       *.                  *.
      ***                 ***
     *****               *****
    .******             *******
    ********            ********
   ,,,,,,,,,***********,,,,,,,,,
  ,,,,,,,,,,,*********,,,,,,,,,,,
  .,,,,,,,,,,,*******,,,,,,,,,,,,
      ,,,,,,,,,*****,,,,,,,,,.
         ,,,,,,,****,,,,,,
            .,,,***,,,,
                ,*,.


     _______ __  __          __
    / ____(_) /_/ /   ____ _/ /_
   / / __/ / __/ /   / __ `/ __ \
  / /_/ / / /_/ /___/ /_/ / /_/ /
  \____/_/\__/_____/\__,_/_.___/


Thank you for installing GitLab!
GitLab should be available at http://192.168.0.4:18080/gitlab

For a comprehensive list of configuration options please see the Omnibus GitLab readme
https://gitlab.com/gitlab-org/omnibus-gitlab/blob/master/README.md

  検証中                  : gitlab-ee-12.2.1-ee.0.el7.x86_64                                                                            1/1

インストール:
  gitlab-ee.x86_64 0:12.2.1-ee.0.el7

完了しました!
インストール後に公開URLを変更したい場合は/etc/gitlab/gitlab.rbを編集します。
## GitLab URL
##! URL on which GitLab will be reachable.
##! For more details on configuring external_url see:
##! https://docs.gitlab.com/omnibus/settings/configuration.html#configuring-the-external-url-for-gitlab
external_url 'http://192.168.0.4:18080/gitlab'
再設定後、gitlab-ctl reconfigureを実行すればgitlab.rbの設定がGitLabに反映されます。
動作確認
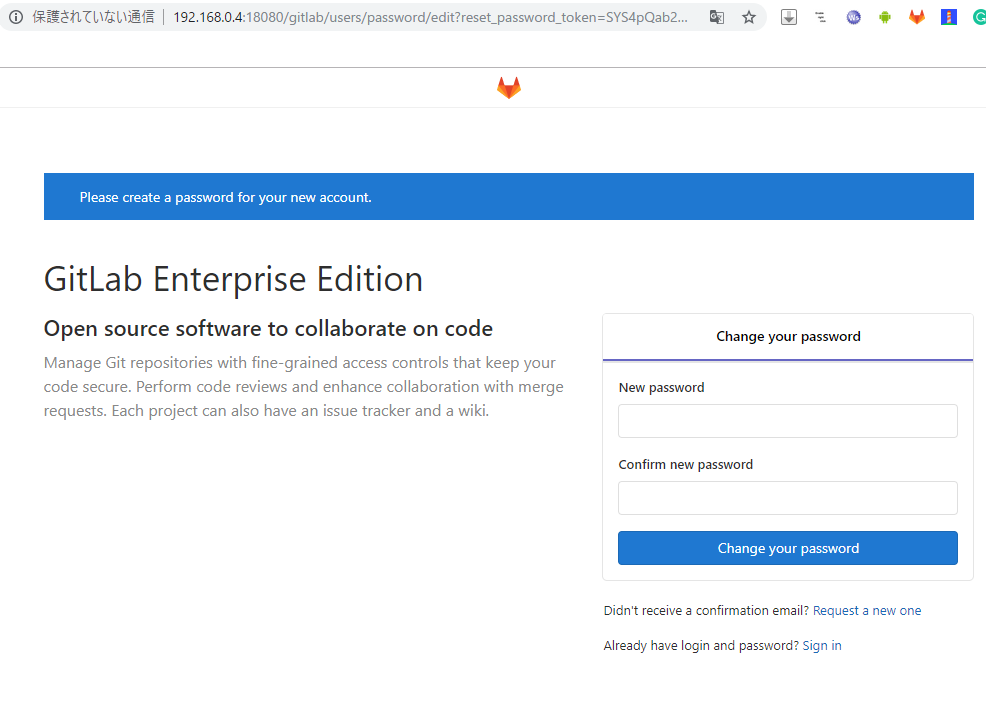
ブラウザでhttp://インストールPCのIP:18080にアクセスすると管理者ユーザ(root)のパスワード設定を求められるので、8桁以上のパスワードを設定します。

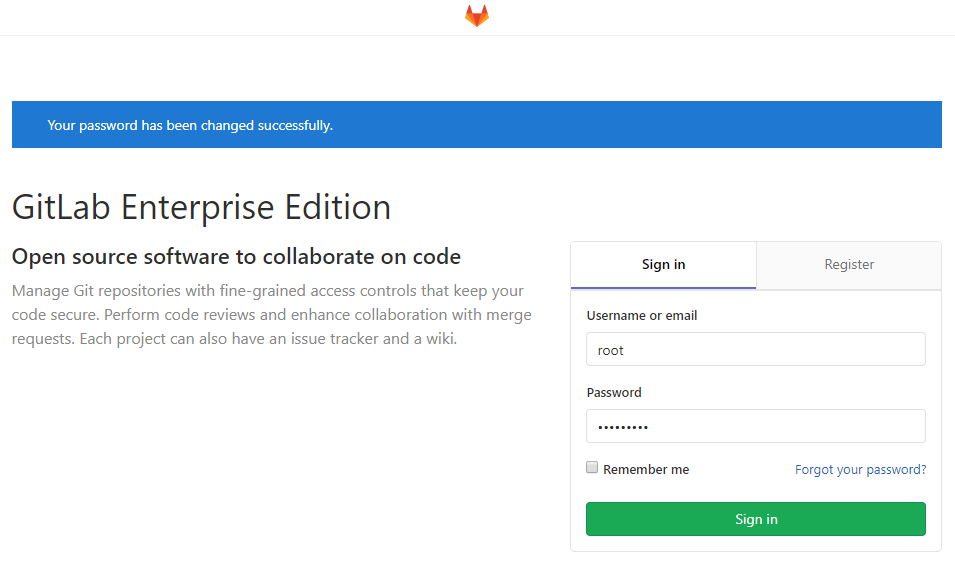
ログイン画面に遷移するので以下を入力。
- Username or email : root
- Password : 先ほど設定したパスワード

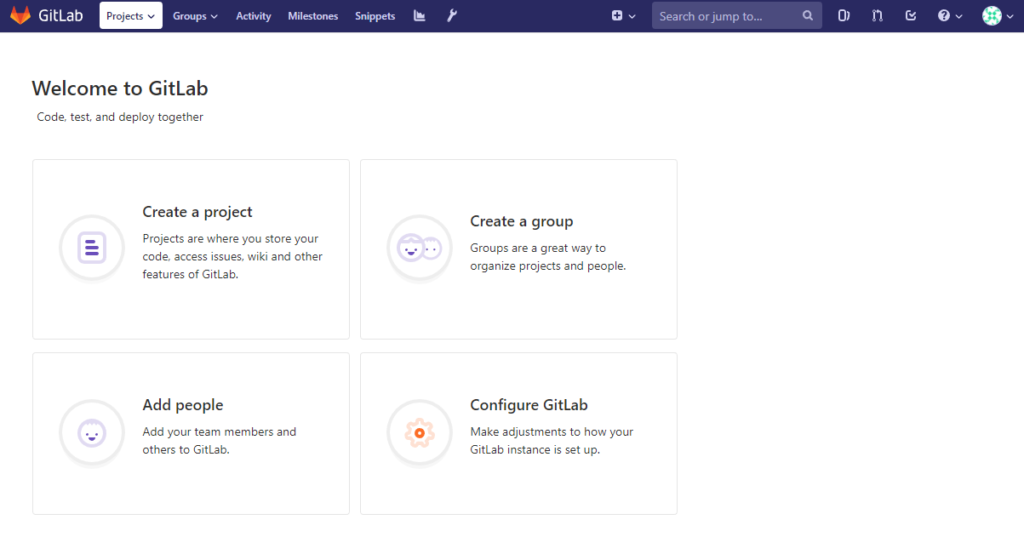
管理者でGitLabにログイン出来ました!

GitLabインストールは至れり尽くせり
GitLabをインストールすることが出来ました。書いたプログラムのバージョン管理はこれで完璧です。
GitLabはnginx、redis、rails、unicorn、PostgreSQL他多数のプログラムで構成されていて、以前はインストールするにはそれなりの知識が必要、ハマリポイントも有りました。
この煩わしさは自動インストール出来る、今回のインストールでも使用した「Omnibus」機能がリリースされた2015年から解消されています。
Omnibus機能は現在も改善が続けられていて、当初より更に簡単にインストールが出来るようになっています。バージョンの違いで上手く動かず、時間を浪費するようなことが無くなってありがたい限りです。
インストールが簡単、かつ機能的にもgithubに勝るとも劣らないオンプレGitLabは、完全プライベートなgitリポジトリが欲しい方のニーズに十二分に応えてくれます。


